
Let’s make the most of staying at home.
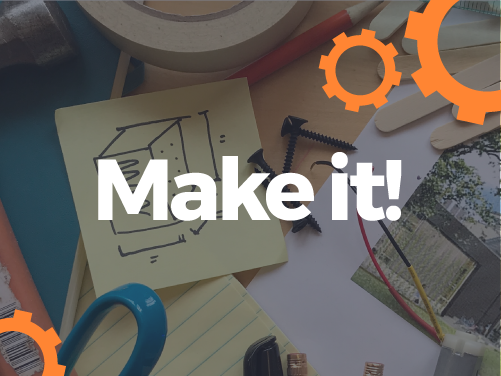
Welcome to Make it!

Join our Maker Educators this week on Make it! Live to build mechanical animals, become an online sculpting master, make a functioning machine, and produce your own songs using electronic music technology.

With Make it! DIY, you’ll learn how to build a series of moving mechanisms (pulleys, ziplines, pendulums) that come together for an epic Chain Reaction challenge.

As always, be sure to post your creations (#makeit) and tag us so we can share them with our KID Museum community.

Ready. Set. Make it!

P.S. Don’t forget to sign up for our newsletter to get Make it! delivered to your inbox every week.

Chain Reaction Challenge

1. Pinwheels

Pinwheels, like windmills, help turn wind energy into electricity. Design and build your own spinning pinwheel using paper, a pencil, and a thumbtack — or go further and build a wind vane out of a plastic bottle!

Suggested Materials
– Paper
– Pencil with eraser
– Thumbtack
– Scissors
– Glue stick
– Optional: Chopstick, hot glue, plastic bottle, cardboard.

Tips and Thoughts:
– How can you alter your pinwheel to change how it spins?
– Curious about how wind turbines create electricity? Read about wind turbines here.
– How can you start and stop your pinwheel from spinning? What does this tell you about how pinwheels work?

Resources
Video for Younger Students
Video for Older Students
Written Instructions

Click here to take this challenge to the next level.

2. Pulleys

One of the six core simple machines, pulleys can be used to make many jobs easier, by reducing the force needed to lift a heavy load. Using a wheel and length of rope, build your own pulleys to do jobs around your home. Test out different sizes and angles to see which one can lift the most!

Suggested Materials
– String
– Small container or paper cups
– Pencil for making holes
– Optional/suggested materials: other round objects with holes in them to use as the wheel( ribbons or thread spools work well), anchor point (coat hanger, carabiners, or even a door handle), something to add as weights on the end of your pulley


Tips and thoughts:
– Where have you seen a pulley before? Can you find any pulleys in your home? What are they used for?
– How does changing the angle of the rope on either side of the pulley affect how easy it is to lift an object?
– Can you put two pulleys together? How does that affect how easy a job is?
– Where in your home can you see a use for a pulley? Challenge yourself to build one to solve a household problem.

Resources
– What is a pulley?
Video for Younger Students
Video for Older Students
Written & Picture Guides

Click here to take this challenge to the next level.

3. Ziplines

Build a zipline in your bedroom or backyard and watch your toys zoom across the room. Ziplines are engineered with the force of gravity in mind, and can be used to transport objects from place to place.

Suggested Materials
– Nylon or slick string
– Paper clip, straws or wire for hook.
– Small box, paper cup or other container (you could even make one out of LEGOs!)
– Toys and other objects to test!
– Tape
– Scissors


Tips and thoughts:
– How does the height of your zipline affect the ride?
– How can you make sure your toy can ride safely for the whole line?
– What type of string works best for building?
– Challenge yourself to test out different hooks and weights to see which goes down the zipline the fastest!

Resources
Video for Younger Students
Video for Older Students
Written Instructions

Click here to take this challenge to the next level.

4. Pendulum Painting

A pendulum is a simple mechanism made by hanging a weight off the end of a string. When you let the weight go, it swings freely back and forth, while keeping time. By following the path of the pendulum with paint, sand, or even a marker, you can make unique works of art that demonstrate how gravity pulls on the pendulum. Warning: this may get messy!

Suggested Materials
– Paper cup
– Paint
– Water
– String
– Pencil for making holes
– An anchor point to tie the pendulum to (this can be off the end of a table, or a rod suspended between two point, or even off the bottom of a tripod.

Tips and thoughts:
– Remember to water down your paint so that its thin enough to fall through the bottom of the cup.
– What kind of pattern does the pendulum make? Can you make different patterns?
– Try changing the weight on the end of the pendulum or the length of the string. Does this change the pattern it makes?

Resources
Video for Younger Students
Video for Older Students
Written Instructions

Click here to take this challenge to the next level.

OR try and make a homemade harmonograph!

5. Chain Reaction Machines

For this week’s final activity, we are challenging you to combine the different moving mechanisms into one amazing chain reaction!

A chain reaction (sometimes called a Rube Goldberg Machine) is when the movement of one object triggers the movement of another, like dominoes knocking each other over. Can you think of a way to connect a pulley to a pinwheel to a pendulum?

Didn’t try this week’s activities? Don’t worry, you can still create chain reactions out of any type of movement, using household materials. The opportunities are endless.

Suggested Materials
– Something that tips
– Something that rolls
– Something that can be used as a ramp
– String
– tape
– Scissors
– Other household items or toys!

Tips and thoughts:
– Start with one reaction, like a ball rolling down a ramp. What kind of movement could that trigger?
– How does starting your reaction with a little height help things move?
– Can you make chain reaction machine do a job? Check out the Rube Goldberg Machine video for inspiration!

Resources
For Younger Students
Video for Older Students
Written Instructions

Click here to take this challenge to the next level.

We'd love to see what you make!

SUBMIT VIA EMAIL

Past Make it! Challenges