
Let’s make the most of staying at home.
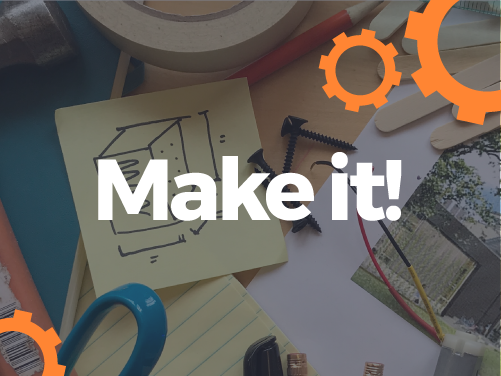
Welcome to Make it!

We’re proud to present our newest skill-building classes, launching this week on Make it! Live. These small-group, live interactive classes are designed to get your mind thinking and your hands making. We also have a fresh crop of creative, single-session workshops that are a much-needed antidote to virtual fatigue.

If you want to take matters into your own hands, this week’s Make it! DIY helps you turn your home into a chemistry lab. Make lava lamps, crystals, lemon volcanoes, and your own weather station. Pretty cool, right?

Don’t forget to post your creations (#makeit) and tag us so we can share them with all of our KID Museum friends.

Ready. Set. Make it!

P.S. Don’t forget to sign up for our newsletter to get Make it! delivered to your inbox every week.

Chemistry Lab

1. Lemon Volcanoes

Explore the chemical reactions between acids and bases by making an erupting volcano in your kitchen using lemons, food coloring and baking soda! The molecules in the lemon juice (an acid), combine with the molecules in the baking soda (a base), in order to create CO2 (a gas), which escapes the liquid in the form of bubbles!

Suggested Materials
– Pan or tray
– Lemons
– Cutting knife
– Butter knife
– Spoon
– Measuring cup
– Baking soda
– Food coloring

Tips and Thoughts:
– What happens when you pour in the baking soda? How long does the reaction last? Write down your observations and make predictions about why this reaction occurs.
– Try out different ways of making holes in the lemon and see if this affects what kind of eruption you get. Remember to write down your observations!
– Do you think this would work with other citrus fruits? Test out the same reaction with other acidic fruits and make observations about each reaction.
– How do you think this reaction could be used to propel or power something?

Resources
Video for All Students
Written Instructions

Click here to take this challenge to the next level. (Adult supervision required)

2. Penny Science

Pennies make a great tool for studying chemical and physical reactions. Make your penny turn green or test out different, unexpected cleaning agents to get an old corroded penny to shine like new again!

Suggested Materials
– Pennies
– Small cups for testing
– Paper towels
– Vinegar
– Dark Cola
– Limes or lemons
– Ketchup
– Salt
– A pencil and paper or notebook for recording your data!


Tips and thoughts:
– Which materials will best clean a penny?
– When running your experiment, make sure to write down your predictions, observations, and results.
– What do you observe about the changes in each penny? What could those observations mean?
– How can you change your test to explore something new? Design a new experiment based on your findings!

Resources
Turn a penny green
Which solution works best?
Written Instructions

Click here to take this challenge to the next level.

Try making your own black light!

3. Lava Lamp

Explore chemical reactions and density by building your very own lava lamp using household items. Density describes how closely together the particles in a substance are packed. For example, if you have a rock and a piece of wood the same size and shape, the rock will be heavier because the particles in the rock are packed closer together than those in the wood. The same can be true of liquids, like oil and water. Groovy.

Suggested Materials
Option 1
– Water
– Clare container
– Food coloring
– Vegetable oil
– Alka Seltzer Tablets
Option 2
– Baking soda
– Vinegar
– Water
– Vegetable oil
– Food coloring
Option 3
– Water
– Food coloring
– Salt
– Oil
Optional Materials:
– Glitter
– Flashlight
– Clear container with a lid.

Tips and thoughts:
– When you combine oil and water in a glass, which one always floats to the top? What do you think that means about which one is denser?
– What happens when you add more alka seltzer or baking soda to your lava lamp?
– Want to take your lava lamp up a notch? Try adding glitter or putting it over a flashlight so it really comes to life!

Resources
Video for Younger Students
Video for Older Students
Written Instructions

Click here to take this challenge to the next level.

4. DIY Crystals

Explore crystallization and different types of rock formations by making your own crystals using household items such as salt, sugar, and warm water. Experiment with making different forms of crystals and remember to take notes about its growth, as they can take up to 8 days to form.

Suggested Materials
– Small pot
– Water (warm)
– Sugar, salt, or borax (found in the laundry aisle)
– String, popsicle stick or other thin utensil
– Heat source (microwave or stove top)
– Glass or jar for growing and observing
– Optional: Food Coloring, pipe cleaners

Tips and thoughts:
– Keep a record of how your crystals develop over time. Where do they start growing? What form do they take? What happens the longer you leave them?
Try making different kinds of crystals. How does the shape of salt crystals compare to the shape of sugar crystals? What do you think that means?
Read more about what crystals are and how they form in nature here.

Resources
Salt Crystals
Sugar Crystals (Adult Supervision Required)
Written Instructions

Click here to take this challenge to the next level.

5. Make your own Weather Station

Meteorologists study changes in weather. By tracking the wind, rain, humidity, temperature, and air pressure, they can make predictions about future weather patterns. Believe it or not, you can turn your home into a weather station by building your own measuring devices from household items.

Suggested Materials
– Rain Gauge: Flat-sided clear jar, ruler, heavy object to attach jar to, waterproof tape
– Wind Vane: Paper plates, small rocks, pencil, paper, scissors, push pin, clay, straw

Tips and thoughts:
– What goes into a weather station? Read about the 6 major tools for measuring weather.
– Keep track of your measurements over the following weeks. What patterns do you notice?
– If you build more than one of the weather measuring instruments see if you can find a pattern between the reading from both of them? What could those patterns mean?

Resources
How to make a rain gauge
How to make a wind vain
Written Instructions

Take this challenge to the next level:
Anemometer (wind speed)
Barometer (air pressure)
Hygrometer (humidity)

We'd love to see what you make!

SUBMIT VIA EMAIL

Past Make it! Challenges